

Have you ever wondered what transforms a good broth into a liquid gold that’s rich, nourishing, and deeply satisfying? The secret lies in beef—nature’s treasure trove of collagen, minerals, and soul-warming flavor. As a home cook, I’ve spent years perfecting this method to create a collagen-rich broth that not only supports joint health and gut healing but also becomes the versatile backbone of your favorite soups, stews, and sauces.
Imagine simmering grass-fed beef bones with garlic, thyme, and a splash of apple cider vinegar (your kitchen’s unsung hero!) to coax out every drop of savory depth. Whether you’re sipping it solo for an immune boost or using it as a base for ramen, this slow-simmered elixir is a game-changer. Let’s turn those humble bones into your ultimate culinary powerhouse—no fancy tools required, just patience and a stockpot. Ready to unlock broth perfection? 🍲✨
Table of Contents
1. Key Benefits: Why Beef Bone Broth Belongs in Your Kitchen
Ever sipped a broth so rich it feels like a hug from the inside? That’s the magic of homemade beef bone broth—a collagen-packed elixir that’s as nourishing as it is delicious. Here’s why this simmered-to-perfection brew deserves a permanent spot in your kitchen:
✨ Joint & Gut Love: Slow-simmered beef bones release collagen, a protein that acts like a repair crew for your joints and gut lining. It’s like a soothing tonic for stiff knees or a cranky stomach!
✨ Immune-Boosting Minerals: Grass-fed bones are nature’s multivitamin, packed with calcium, magnesium, and phosphorus—key players for strong bones and a resilient immune system.
✨ Flavor That Elevates Everything: Forget bland store-bought stock. This broth’s savory umami depth transforms soups, sauces, and even rice into crave-worthy masterpieces.
Pro Tip:
Simmer your broth for a full 24 hours (yes, patience pays off!). This low-and-slow method extracts every drop of gelatin and minerals, giving you that signature silky, nutrient-dense texture.
Ready to brew your own liquid gold? Let’s grab those bones and get started! �
2. Ingredients: Your Kitchen Allies for Broth Brilliance
Great broth starts with great ingredients—but don’t worry, you won’t need anything fancy! Here’s your simple, wholesome lineup to create a rich, umami-packed homemade stock that’s bursting with flavor and nutrients:
✅ The Essentials
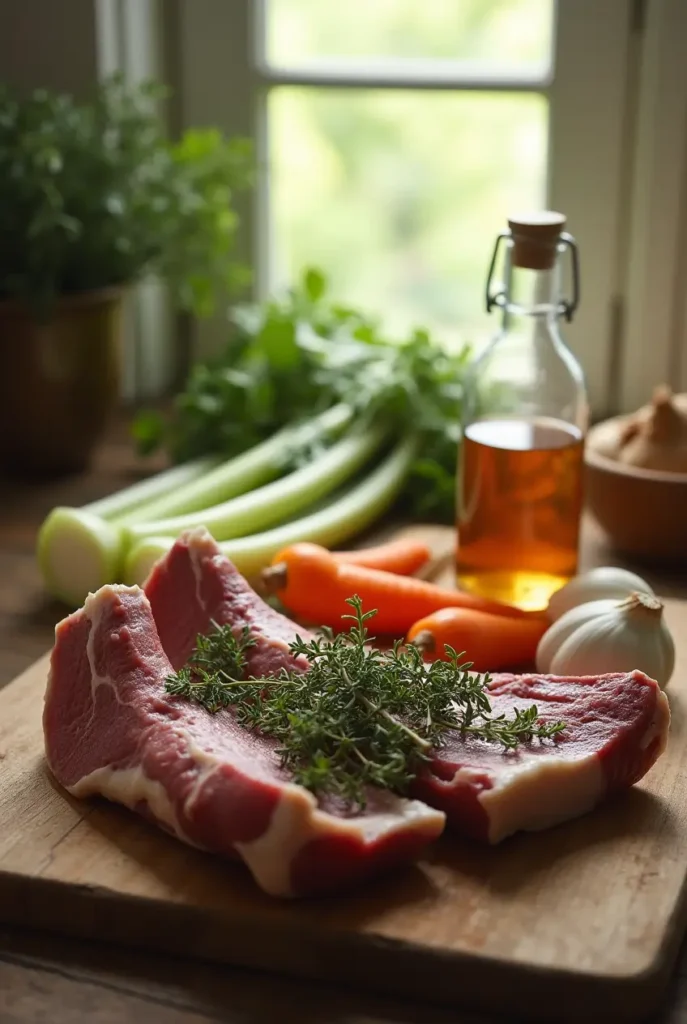
- 2-3 lbs grass-fed beef bones (mix marrow, knuckle, and oxtail for maximum collagen and depth).
- 2 tbsp apple cider vinegar – helps extract minerals like calcium and magnesium from the bones.
- 1 onion, quartered (leave the skin on for golden color!).
- 3 carrots, roughly chopped – adds natural sweetness.
- 3 celery stalks, chopped – for earthy undertones.
- 4 garlic cloves, smashed – a flavor powerhouse with anti-inflammatory perks.
✅ Aromatic Boosters
- 2 bay leaves – the secret to a fragrant, complex base.
- 1 tsp black peppercorns – enhances nutrient absorption.
- Small bunch of fresh thyme or parsley (optional, but highly recommended for freshness).
Pro Tip:
Roast your bones at 400°F (200°C) for 25-30 minutes before simmering. This caramelizes the marrow and unlocks next-level umami flavor (thank you, Maillard reaction!).
Why Grass-Fed?
Grass-fed bones pack more omega-3s and vitamins than conventional options, making your broth a true nutrient-dense kitchen staple.
3. Instructions: Simmer Your Way to Broth Mastery

Let’s turn those ingredients into liquid gold! Follow these simple steps for a collagen-rich broth that’s silky, flavorful, and packed with gut-loving goodness. I’ve broken it down so even first-timers can nail it—no chef skills required!
Step 1: Roast for Maximum Flavor
- Prep the Bones: Arrange your grass-fed beef bones on a baking sheet. Don’t crowd them—they need space to caramelize!
- Roast: Pop them into a 400°F (200°C) oven for 25-30 minutes until golden-brown. This step is non-negotiable—it’s where the savory umami depth begins!
- Deglaze: After roasting, scrape those crispy bits (aka flavor gold) into your stockpot with ½ cup of water.
Step 2: Slow-Simmer for Nutrient Magic
- Add Everything to the Pot:
- Roasted bones + deglazed juices
- Chopped veggies, garlic, herbs, and apple cider vinegar (your mineral-extracting MVP!).
- Cover with 12 cups of cold water (start cold for gradual flavor release).
- Simmer Low & Slow:
- Bring to a gentle boil, then reduce heat to a bare simmer (tiny bubbles only!).
- Skim the foam (use a spoon or fine mesh) in the first 30 minutes for crystal-clear broth.
- Partially cover and let it work its magic for 18-24 hours. Yes, patience is key—this unlocks that gelatinous texture!
Step 3: Strain & Store Like a Pro
- Strain: Pour the broth through a cheesecloth-lined strainer to catch all bits. Squeeze the veggies gently—they’ve given their all!
- Cool: Let it sit at room temp for 30 minutes, then refrigerate for 2 hours. The fat will rise to the top for easy skimming.
- Store:
- Fridge: Keep in airtight jars for 5 days.
- Freezer: Pour into ice cube trays or containers for up to 6 months (hello, instant flavor boosts!).
Pro Tips to Elevate Your Broth:
- Instant Pot Shortcut: Short on time? Pressure-cook on high for 3 hours (still yields great collagen!).
- Broth Clarity Hack: Avoid stirring once simmering starts—disturbance = cloudy broth!
- Gelatin Test: Chill a spoonful. If it jiggles like Jell-O, you’ve nailed the collagen extraction!
4. Pro Tips and Variations: Customize Your Broth Like a Chef
Here’s the fun part—making this broth uniquely yours! Whether you’re a minimalist or a flavor adventurer, these tips and twists will help you level up your collagen-rich broth game.
Pro Tips for Broth Brilliance
🔥 Boost Umami: Toss in a dried shiitake mushroom or a strip of kombu during the last hour of simmering. They’re stealthy flavor bombs!
🔥 Spice It Up: Add a cinnamon stick or star anise for a warming, aromatic twist (perfect for pho-inspired broths).
🔥 Crystal-Clear Broth: For restaurant-worthy clarity, avoid boiling aggressively and skim foam early and often.
🔥 Fat = Flavor: Don’t discard all the fat! Leave a little for sautéing veggies or roasting potatoes later.
Time-Saving Hacks
⏱️ Instant Pot Magic: Short on 24 hours? Pressure cook on high for 3 hours with a natural release. It’ll still deliver that gelatinous texture!
⏱️ Batch & Freeze: Pour cooled broth into silicone muffin molds for single-serve portions—ideal for quick soups or deglazing pans.
Flavor Variations to Try
🌿 Anti-Inflammatory Boost: Stir in 1 tsp turmeric and a thumb of grated ginger during the last hour.
🍅 Rich & Robust: Char an extra onion or tomato on the stove before adding to the pot for smoky depth.
🍋 Bright & Zesty: Finish with lemon zest and a handful of fresh dill for a springtime sipping broth.
5. Serving Suggestions: Savor Your Broth in 10 Delicious Ways
Your collagen-rich broth isn’t just a soup base—it’s a kitchen superhero! Here’s how to make the most of that savory umami depth in everyday meals (and a few surprises):
Classic Uses
🍜 Ramen Revival: Pour over noodles, soft-boiled eggs, and greens for a restaurant-worthy bowl.
🍲 Soups & Stews: Swap water with broth in lentil soup, chili, or minestrone for next-level flavor.
🍚 Grain Booster: Cook rice, quinoa, or farro in broth instead of water—it’s a game-changer for pilafs!
Unexpected Twists
🥣 Sip It Straight: Warm a mug with a pinch of sea salt, turmeric, and a squeeze of lemon for a gut-loving tonic.
🍛 Sauces & Gravies: Reduce broth with wine or miso for a velvety sauce to drizzle over roasted veggies or steak.
🥔 Mashed Potato Magic: Substitute half the milk in your mash with broth for creamy, flavor-packed spuds.
Quick & Healthy Hacks
🍳 Morning Boost: Use broth to poach eggs or simmer oats for a savory breakfast.
🌱 Veggie Saute: Deglaze pans with broth instead of oil for a lighter, nutrient-rich stir-fry.
🥧 Freeze for Later: Ice cube trays of broth = instant flavor bombs for sautéing greens or reheating leftovers!
Pro Tip:
For a cozy night in, add a splash of broth to miso paste, grated ginger, and soba noodles. Top with green onions—it’s instant hygge in a bowl!
6. Conclusion: Your Homemade Broth Journey Starts Here
Congratulations—you’ve just unlocked the secret to liquid gold that’s as nourishing as it is delicious! By simmering those humble grass-fed beef bones into a collagen-rich broth, you’re not just making soup base; you’re crafting a kitchen staple that supports gut health, soothes joints, and elevates every dish it touches.
Think of this broth as your culinary sidekick:
- Cost-Effective: Skip pricey store-bought versions loaded with preservatives.
- Versatile: From sipping tonic to risotto magic, it’s a flavor powerhouse.
- Freezer-Friendly: Batch-cook once, and enjoy nutrient-dense meals for months.
Remember, the 24-hour simmer isn’t a chore—it’s a ritual. As the bones slowly release their minerals and gelatin, you’re building a foundation for vibrant cooking and vibrant health.
So, whether you’re ladling it into a steaming bowl of ramen or sipping it solo on a chilly day, take pride in knowing you’ve created something truly special. Now, go pour yourself a mug (or freeze a batch for future you!). Trust me, your taste buds—and your body—will thank you. 🍵✨
7. FAQs: Your Beef Bone Broth Questions, Answered
Got questions? I’ve got answers! Here’s the scoop on mastering your collagen-rich broth without the guesswork:
Can I use any beef bones, or are some better than others?
Opt for marrow and knuckle bones (hello, gelatin!) or oxtail for maximum collagen. Avoid lean cuts like rib bones—they’re tasty but lack the connective tissue needed for that silky texture.
Why add apple cider vinegar?
It’s your broth’s BFF! The acidity helps extract minerals like calcium and magnesium from the bones, making your stock a nutrient powerhouse.
How long does homemade broth last?
Fridge: 5 days in airtight jars.
Freezer: Up to 6 months (freeze in ice cubes for single servings!).
Can I speed up the simmering time?
Yes! An Instant Pot pressure-cooks broth in 3 hours. It won’t be quite as gelatinous but still packs a nutritional punch.
My broth didn’t gel—what did I do wrong?
No sweat! Short simmer time or too few marrow bones might be the culprit. Next time, simmer for 18-24 hours and add extra marrow-rich bones.
Do I really need to roast the bones first?
Highly recommended! Roasting unlocks caramelized flavor via the Maillard reaction. Skip it, and your broth will taste flat (trust me, I’ve tried!).
Can I make a vegetarian version with similar benefits?
While veggie broth is delicious, it won’t have collagen. For a gut-friendly plant-based option, simmer shiitake mushrooms and kombu for umami, but manage expectations on the gelatin front.
How do I keep my broth from turning cloudy?
Low and slow is the mantra! Avoid boiling, skim foam early, and don’t stir once simmering. Cheesecloth straining helps too!