
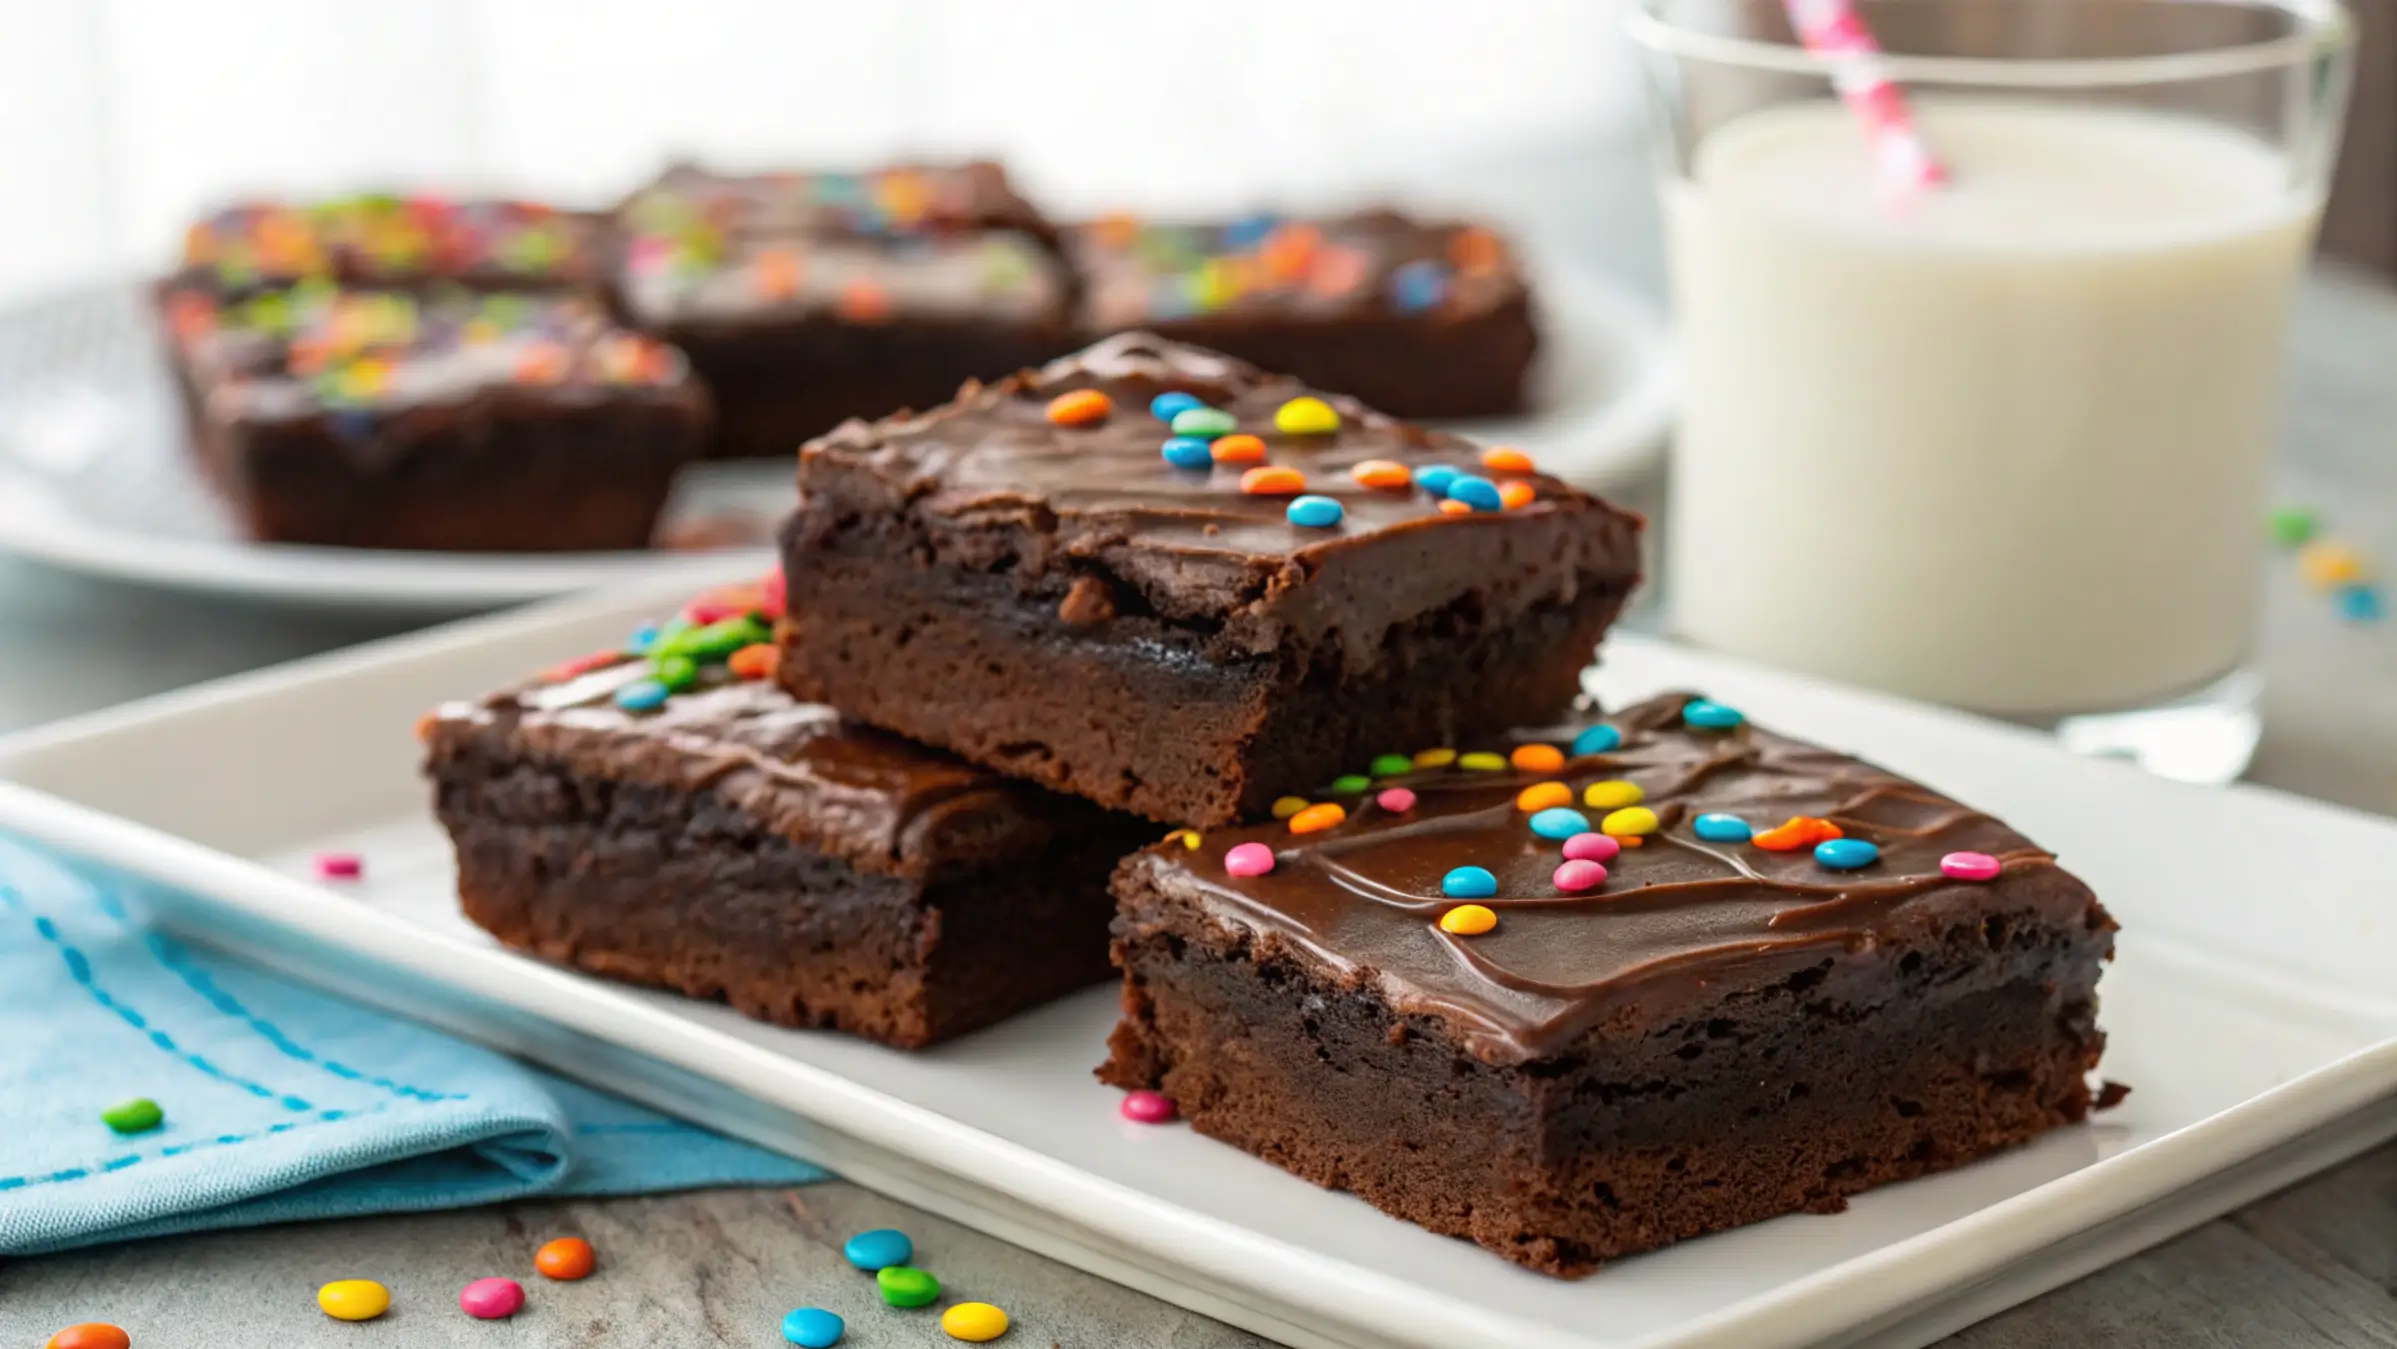
Remember opening your lunchbox as a kid and finding that plastic-wrapped treat with the familiar chocolate frosting and rainbow sprinkles? Little Debbie’s Cosmic Brownies have been a beloved snack for generations, combining fudgy chocolate brownies with that signature ganache topping and colorful candy pieces. But what if I told you that you could make these nostalgic treats at home—and they might even taste better than the originals?
Homemade Cosmic Brownies capture all the magic of the store-bought version but with the added benefits of fresh ingredients, customizable flavors, and the satisfaction of creating something special from scratch. Many home bakers struggle to achieve that perfect dense, fudgy texture or the glossy frosting that makes Cosmic Brownies so distinctive. The good news? This recipe solves all those common pitfalls.
As someone who has tested countless Cosmic Brownies recipes over the years, I’m excited to share my perfected version that delivers on taste, texture, and that crucial nostalgia factor. Whether you’re making these for a school lunchbox, an afternoon treat, or just to satisfy your inner child, these homemade Cosmic Brownies are guaranteed to impress.
Ingredients for the Perfect Cosmic Brownies
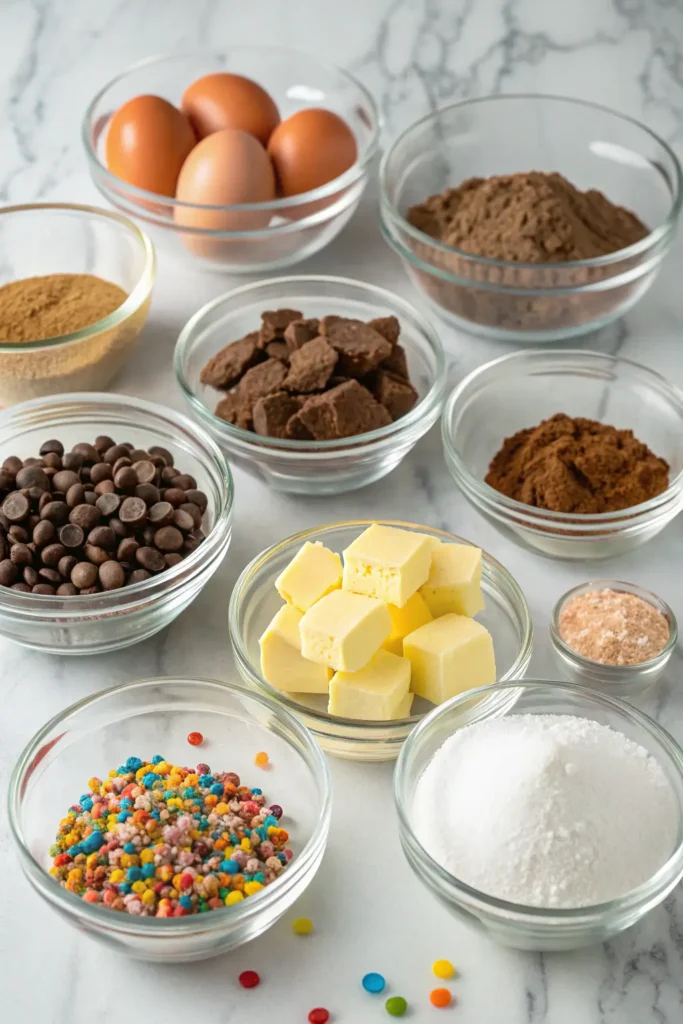
For the Brownie Base:
- 1 cup (226g) unsalted butter
- 2 cups (400g) granulated sugar
- 4 large eggs, room temperature
- 2 teaspoons vanilla extract
- 1 cup (120g) all-purpose flour
- 1 cup (85g) unsweetened cocoa powder (Dutch-processed for a deeper flavor)
- 1 teaspoon salt
- ¼ teaspoon baking powder
For the Ganache Topping:
- 1 cup (6oz/170g) semi-sweet chocolate chips
- ½ cup (120ml) heavy cream
- 2 tablespoons unsalted butter
- 1 teaspoon vanilla extract
- Pinch of salt
For Decoration:
- ¼ cup rainbow chip sprinkles or mini M&Ms
Ingredient Roles and Substitutions
“The secret to amazing Cosmic Brownies isn’t just in the recipe—it’s understanding why each ingredient matters.”
Butter: Creates richness and helps achieve that dense, fudgy texture. For a dairy-free option, you can substitute with coconut oil, though the flavor will be slightly different.
Sugar: Beyond sweetness, sugar contributes to the moisture and texture of the brownies. You can use brown sugar for a deeper molasses flavor or reduce slightly for a less sweet version.
Eggs: Provide structure and help create that shiny, crackly top. For vegan brownies, substitute with flax eggs (1 tbsp ground flaxseed + 3 tbsp water per egg).
Cocoa Powder: The star ingredient that gives these brownies their chocolate flavor. Dutch-processed cocoa creates a deeper, more intense chocolate taste than natural cocoa. For extra richness, you can use dark cocoa powder.
Flour: Less flour equals fudgier brownies. Use all-purpose for the best results, or a 1:1 gluten-free flour blend for a gluten-free option.
Baking Powder: Just a touch helps with a slight rise without making them cakey. Omit for even denser brownies.
Heavy Cream: Creates a smooth, glossy ganache. Can substitute with full-fat coconut milk for a dairy-free option.
Chocolate Chips: Semi-sweet creates the classic Cosmic Brownie taste, but you can experiment with milk chocolate for a sweeter topping or dark chocolate for a more intense flavor.
Step-by-Step Instructions
Preparing the Brownie Base
- Preheat and Prepare: Set your oven to 350°F (175°C). Line a 9×13-inch baking pan with parchment paper, leaving overhang on the sides for easy removal.
- Melt the Butter: In a microwave-safe bowl or on the stovetop, melt the butter completely.
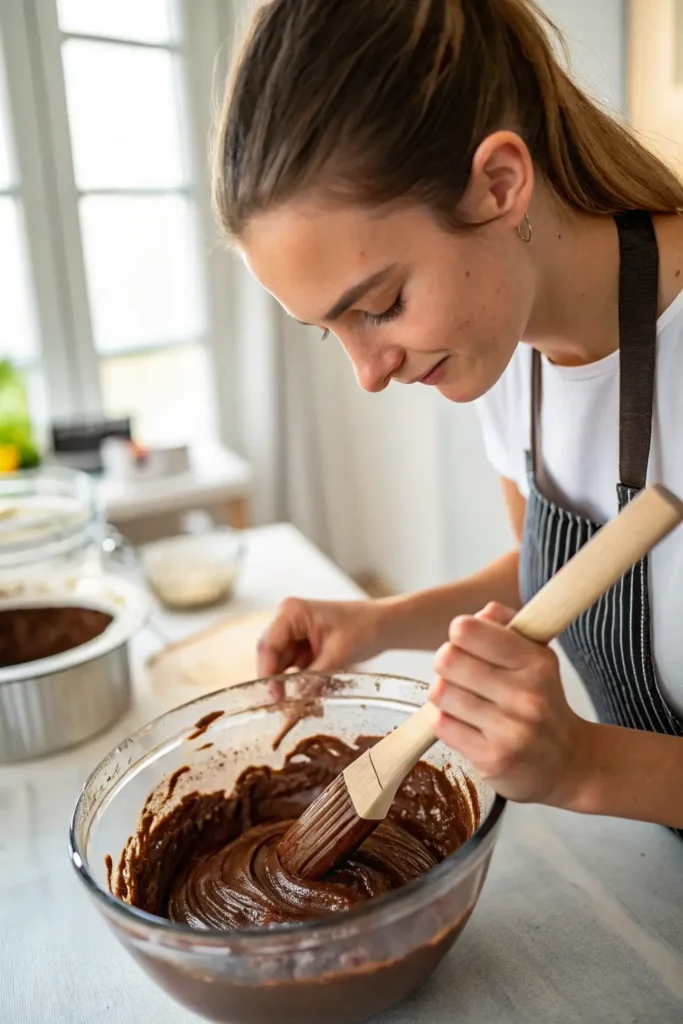
- Mix Wet Ingredients: While the butter is still warm (not hot), whisk in the sugar until well combined. Add eggs one at a time, whisking well after each addition. Stir in the vanilla extract.
- Combine Dry Ingredients: In a separate bowl, whisk together the flour, cocoa powder, salt, and baking powder.
- Create the Batter: Gradually add the dry ingredients to the wet ingredients, folding gently until just combined. Avoid overmixing, which can make the brownies tough.
- Bake: Pour the batter into the prepared pan and spread evenly. Bake for 25-30 minutes, or until a toothpick inserted in the center comes out with a few moist crumbs (not wet batter).
- Cool Completely: Allow the brownies to cool fully in the pan before frosting. This may take 1-2 hours.
Pro Tip: For extra fudgy brownies, refrigerate them for 30 minutes before cutting.
Creating the Perfect Ganache
- Heat the Cream: In a small saucepan, heat the heavy cream until it just begins to simmer (don’t boil).
- Prepare Chocolate: Place chocolate chips and butter in a heat-safe bowl.
- Pour and Wait: Pour the hot cream over the chocolate and butter. Let it sit undisturbed for 2-3 minutes.
- Stir to Smooth: Gently stir until the mixture becomes smooth and glossy. Add vanilla extract and salt.
- Cool Slightly: Allow the ganache to cool for about 5 minutes before spreading.
- Frost and Decorate: Pour the ganache over the cooled brownies, spreading evenly with an offset spatula. Immediately sprinkle with rainbow chips or mini M&Ms.
- Set the Ganache: Refrigerate for 30 minutes to set the ganache before cutting.
Baking Tips & Troubleshooting
Common Mistakes to Avoid
| Issue | Cause | Solution |
|---|---|---|
| Dry Brownies | Overbaking | Remove from oven when center is still slightly underdone |
| Cakey Texture | Too much flour | Measure flour carefully; use weight measurements if possible |
| Ganache too runny | Cream too hot or not enough cooling time | Let ganache cool longer before spreading |
| Brownies stick to pan | Improper preparation | Always use parchment paper with overhang |
Achieving Your Perfect Texture
- For Fudgier Brownies: Reduce flour by 2 tablespoons and bake for the minimum time suggested.
- For Chewier Brownies: Add an extra egg yolk to the batter.
- For More Cake-Like Brownies: Increase flour by 2 tablespoons and add ¼ teaspoon more baking powder.
Oven Adjustments
Different ovens can vary significantly in temperature. Use an oven thermometer for accuracy. If your oven runs hot, reduce the temperature by 25°F. For convection ovens, reduce temperature by 25°F and check brownies about 5 minutes earlier than the recipe suggests.
Variations & Adaptations
Chocolate Variations
- Triple Chocolate: Add ½ cup chocolate chips to the brownie batter.
- White Chocolate Cosmic: Use white chocolate for the ganache for a striking contrast.
- Mocha Cosmic: Add 1 tablespoon instant espresso powder to the brownie batter.
Mix-In Ideas
- Nutty Cosmic: Add ½ cup chopped walnuts or pecans to the batter.
- Mint Chocolate: Add ¼ teaspoon mint extract to the ganache.
- Salted Caramel: Drizzle caramel sauce between the brownie layer and ganache.
Dietary Adaptations
Gluten-Free Cosmic Brownies:
- Substitute all-purpose flour with a 1:1 gluten-free baking blend.
- Add ¼ teaspoon xanthan gum if your blend doesn’t include it.
Vegan Cosmic Brownies:
- Replace eggs with flax eggs (1 tablespoon ground flaxseed + 3 tablespoons water per egg).
- Use plant-based butter and coconut cream for the ganache.
- Ensure your sprinkles are vegan-friendly.
Storage & Serving Instructions
How to Store
- Counter Storage: Store in an airtight container at room temperature for up to 3 days.
- Refrigerator: Keep refrigerated for up to 1 week for firmer brownies.
- Freezer: Wrap individual brownies in plastic wrap, then aluminum foil. Freeze for up to 3 months.
Serving Suggestions
- Classic Serve: Enjoy at room temperature with a cold glass of milk.
- Dessert Upgrade: Warm slightly and serve with a scoop of vanilla ice cream.
- Brownie Sundae: Top with hot fudge, whipped cream, and a cherry.
Storage Tip: Place parchment paper between layers when storing to prevent sticking.
Homemade Cosmic Brownies
Ingredients
For the Brownie Base:
- 1 cup Unsalted butter (Can substitute with coconut oil for a dairy-free option.)
- 2 cups Granulated sugar (Brown sugar can be used for a deeper flavor.)
- 4 large Eggs (room temperature) (Use flax eggs for a vegan alternative.)
- 2 teaspoons Vanilla extract (Pure vanilla extract is recommended for best flavor.)
- 1 cup All-purpose flour (Use a 1:1 gluten-free flour blend for a gluten-free version.)
- 1 cup Unsweetened cocoa powder (Dutch-processed) (Dutch-processed cocoa creates a richer flavor.)
- 1 teaspoon Salt (Balances sweetness and enhances flavor.)
- ¼ teaspoon Baking powder (Optional—use for a slight rise, omit for denser brownies.)
For the Ganache Topping:
- 1 cup Semi-sweet chocolate chips (You can use milk chocolate or dark chocolate for different flavors.)
- ½ cup Heavy cream (Full-fat coconut milk can be used for a dairy-free option.)
- 2 tablespoons Unsalted butter (Adds smoothness to the ganache.)
- 1 teaspoon Vanilla extract (Enhances the chocolate flavor in the ganache.)
- Pinch Salt (Helps balance sweetness in the ganache.)
For Decoration:
- ¼ cup Rainbow chip sprinkles or mini M&Ms (Customize with your preferred candy pieces or sprinkles.)
Instructions
Preparing the Brownie Base:
- Preheat your oven to 350°F (175°C). Line a 9×13-inch baking pan with parchment paper, leaving an overhang on the sides for easy removal.
- In a microwave-safe bowl or on the stovetop, melt the butter completely.
- While the butter is still warm (not hot), whisk in the sugar until well combined. Add the eggs one at a time, whisking well after each addition. Stir in the vanilla extract.
- In a separate bowl, whisk together the flour, cocoa powder, salt, and baking powder.
- Gradually add the dry ingredients to the wet ingredients, folding gently until just combined. Be careful not to overmix.
- Pour the batter into the prepared pan and spread it evenly. Bake for 25-30 minutes, or until a toothpick inserted in the center comes out with a few moist crumbs (not wet batter).
- Allow the brownies to cool completely in the pan before frosting. This may take 1-2 hours.
- Pro Tip: For extra fudgy brownies, refrigerate them for 30 minutes before cutting.
Creating the Perfect Ganache:
- In a small saucepan, heat the heavy cream until it just begins to simmer (don’t let it boil).
- Place chocolate chips and butter in a heat-safe bowl.
- Pour the hot cream over the chocolate and butter. Let it sit undisturbed for 2-3 minutes.
- Gently stir until the mixture becomes smooth and glossy. Add vanilla extract and salt.
- Allow the ganache to cool for about 5 minutes before spreading over the brownies.
- Pour the ganache over the cooled brownies, spreading it evenly with an offset spatula. Immediately sprinkle with rainbow chip sprinkles or mini M&Ms.
- Refrigerate the brownies for 30 minutes to set the ganache before cutting.
Notes
-
Storage:
- Store leftover brownies in an airtight container at room temperature for up to 3 days. For firmer brownies, refrigerate them for up to 1 week. If you want to store them for a longer period, wrap them individually in plastic wrap and then in aluminum foil before freezing for up to 3 months.
-
Make Ahead:
- These brownies actually taste even better the next day, as the flavors develop. You can make them up to 2 days in advance and store them in an airtight container.
-
Ganache Setting Tips:
- If your ganache is too runny, allow it to cool for a longer period before spreading it over the brownies. You can also add a bit more chocolate to thicken it up.
-
Variations:
- Experiment with different toppings such as chopped nuts, chocolate chips, or even a drizzle of salted caramel to make the brownies your own.
- For a gluten-free version, swap the all-purpose flour with a 1:1 gluten-free flour blend and add xanthan gum if needed.
-
Substitutions:
- For a dairy-free version, substitute the butter with coconut oil and use coconut cream in place of heavy cream for the ganache.
- Vegan substitutes can include flax eggs (1 tbsp ground flaxseed + 3 tbsp water per egg) and plant-based butter.
-
Serving Suggestions:
- Serve these brownies as a classic dessert with a cold glass of milk or warm them slightly and top them with vanilla ice cream for an extra indulgent treat.
Frequently Asked Questions
Can I make Cosmic Brownies ahead of time?
Yes! These brownies actually taste better the next day as the flavors develop. You can make them up to 2 days in advance.
Why didn’t my ganache set properly?
If your ganache is too runny, it may need more time to cool or the ratio of chocolate to cream might be off. Try adding a bit more chocolate or cooling it longer.
Can I double this Cosmic Brownies recipe?
Absolutely! Use two 9×13-inch pans rather than one larger pan for even baking.
How do I know when my brownies are done?
Insert a toothpick in the center—it should come out with a few moist crumbs, not wet batter. The edges will also start to pull away from the sides of the pan.
Can I use box mix as a shortcut for Cosmic Brownies?
While you can, homemade brownies provide a better texture and flavor. If using a box mix, choose a fudgy variety and follow the box instructions before adding the ganache.
What makes homemade Cosmic Brownies better than store-bought?
Homemade versions contain real chocolate, pure vanilla, and no preservatives. The texture is fresher, and you can customize the sweetness and flavor to your preference.
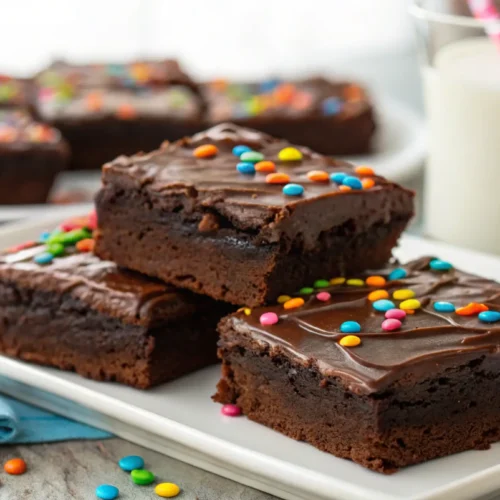
Making homemade Cosmic Brownies is more than just recreating a nostalgic treat—it’s about elevating a childhood favorite with quality ingredients and personal touches. Whether you’re making these for a special occasion or just to satisfy a chocolate craving, this recipe delivers the perfect balance of fudgy brownie, silky ganache, and colorful sprinkles that make Cosmic Brownies so beloved.
Have you tried making Cosmic Brownies at home? Share your experience in the comments below!